Demo: How to Build a Container Registry from a Container Cloud Advocate
What came first the container or the container registry? Find out and learn how to build, run, and scan your very own container registry from a container itself on your laptop.
Containers have been around for a while now. People have been wrapping up their application’s code, dependencies, and associated libraries and files literally in an eggshell, and then running them using Docker and other container-based orchestrators.
If you are like me, you have probably used the container registry services from public cloud service providers (CSPs) such as Amazon Elastic Container Registry (ECR), Microsoft Azure Container Registry (ACR), and Google Cloud™ Container Registry (GCR). CSPs want to logically provide a storage location to organize, tag, and store each version of their application in those container images. Think: eggs in a basket. One of the great mysteries in life has been solved: the container (egg) came first and then the container image repository or registry.


Demo Part 1: Building your container registry Have you ever wanted to build your own container registry? Maybe you just want to try out building some container images locally on a dev/test box and store the images prior to pushing them to a production registry that you must pay storage costs for. Or perhaps you are new to containers, saw this article title and thought: hey, why not? I’d like to try my hand at building a container registry.
I am going to show you how to use Docker to build a container registry and then scan images for vulnerabilities using Trend Micro Cloud One™ – Container Security. Afterward, you’ll have your very own container factory running on your local laptop. Let’s get started.
- Visit the Docker Desktop site to download and install it. Docker Desktop is “the fastest way to learn about containers and containerize applications on your desktop”
- After the installation is complete. Open the app and click on the “settings gear” to one-click enable Kubernetes. What’s that you say? I don’t have to run all kinds of setup to get Kubernetes? Nope my friends. One click away.

- After enabling Kubernetes, Docker Desktop will restart. You should see the Docker and the Kubernetes logo in green in the lower left-hand corner, as pictured above.
Now you are ready to deploy your very own container registry. Ironically, you can build your own container registry with a Dockerfile. Think of a Dockerfile as a recipe, but instead of providing all the ingredients you need, it has everything your container needs to run, live, and thrive! So, grab your text editor like Notepad, or if you’re feeling fancy, you can use an IDE like Visual Studio Code. I recommend the Visual Studio Code option because it has Docker extensions that you can use to easily build and run your container.
Paste this Dockerfile code into a new file in Visual Studio Code and let’s have a look.
So, what’s going on in here?
The FROM line is used to specify a base container image that you want to use as a launchpad or a reference container to build upon. Docker’s registry container is ready to go, we just have to configure it in the Dockerfile, which is used to build our container. How cool is that? I used the deployment guide to build the registry and use the sample Dockerfile with basic password authentication for testing.
The two RUN lines are used to:
- Create a htpasswd file to set up your initial registry log-on credentials. I used “admin” as the username and as the password since this is just for fun, but for “real” uses, it’s best practice to choose stronger credentials.
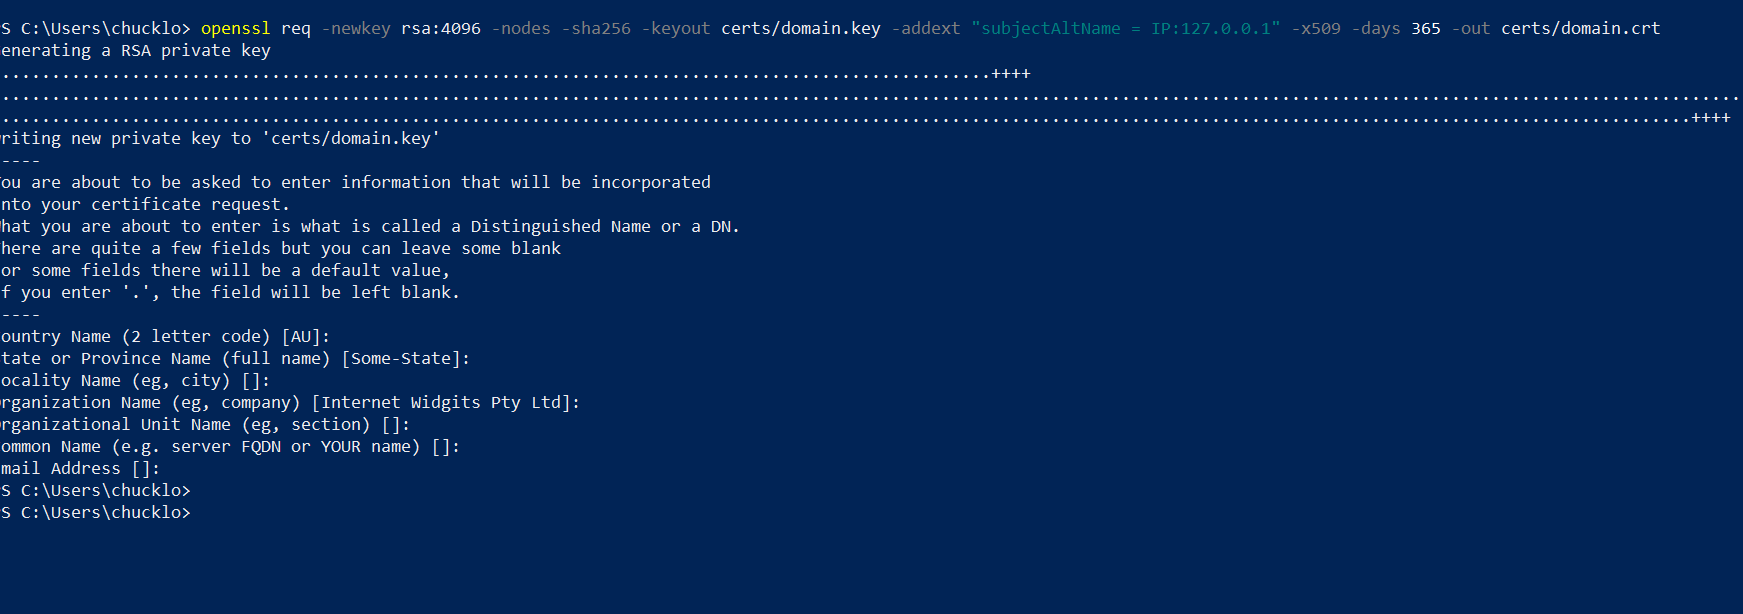
- Create a certificate directory to store your self-signed certificates. You can always use a third-party CA signing authority, but you will have to pay for that. Since this is just an experiment and for fun, self-signed certificates are fine. Generate your own here.
Copy your certificate key and self-signed certificate to the container so when you push and pull certificates it is done over SSL.
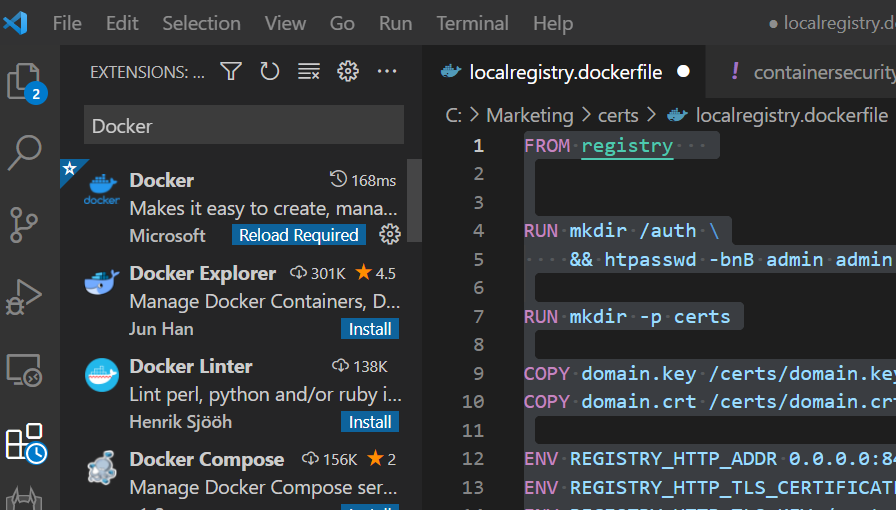
Install the official Docker extension for Visual Studio Code. You can do this by navigating to the extension area in the IDE environment and searching for the official Docker extension.
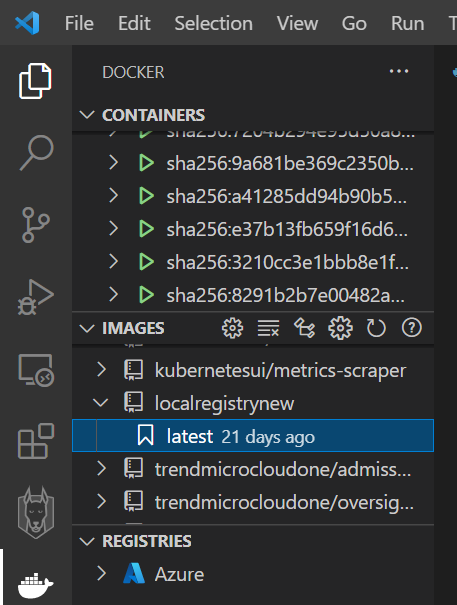
Now, right click the Dockerfile in your saved registry and choose to build the container and run it (interactively). You should see the registry image in your image directory. It will be running and listening for TLS on HTTPS port 8443 on your local computer.

Building Container Output:
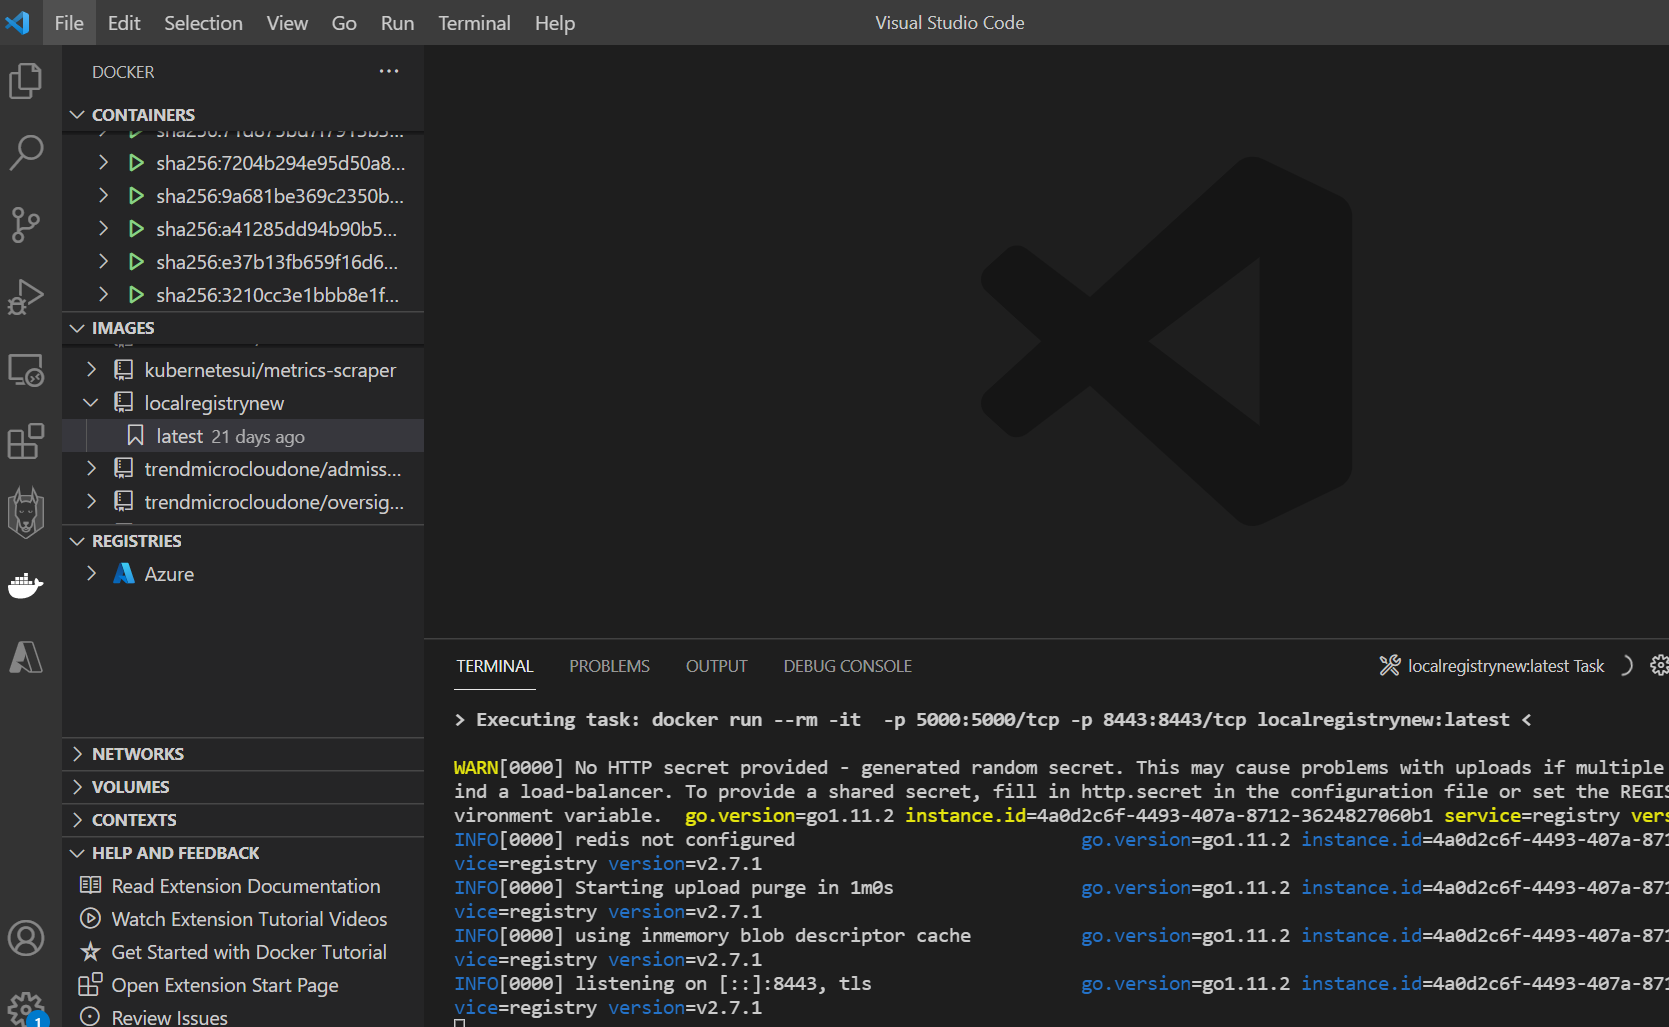
Running Container Output:
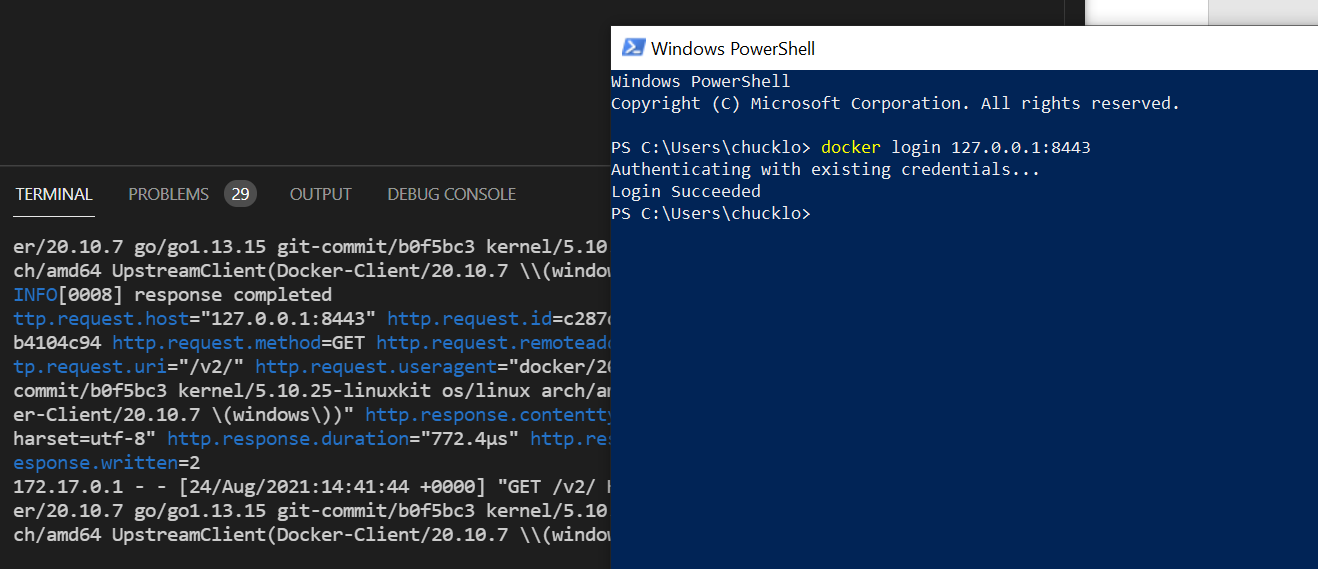
Now it’s time to test logging on the container registry and pull and push a new image into it.
You can execute the Docker login command in PowerShell. This allows you to log into your registry with stored creds or prompt for new creds.
After you have logged in, it’s time to pull and push a vulnerable test container to scan. You can do this with the popular DVWA container test image. The next steps are to pull down, tag, and push the public test image into your local registry.
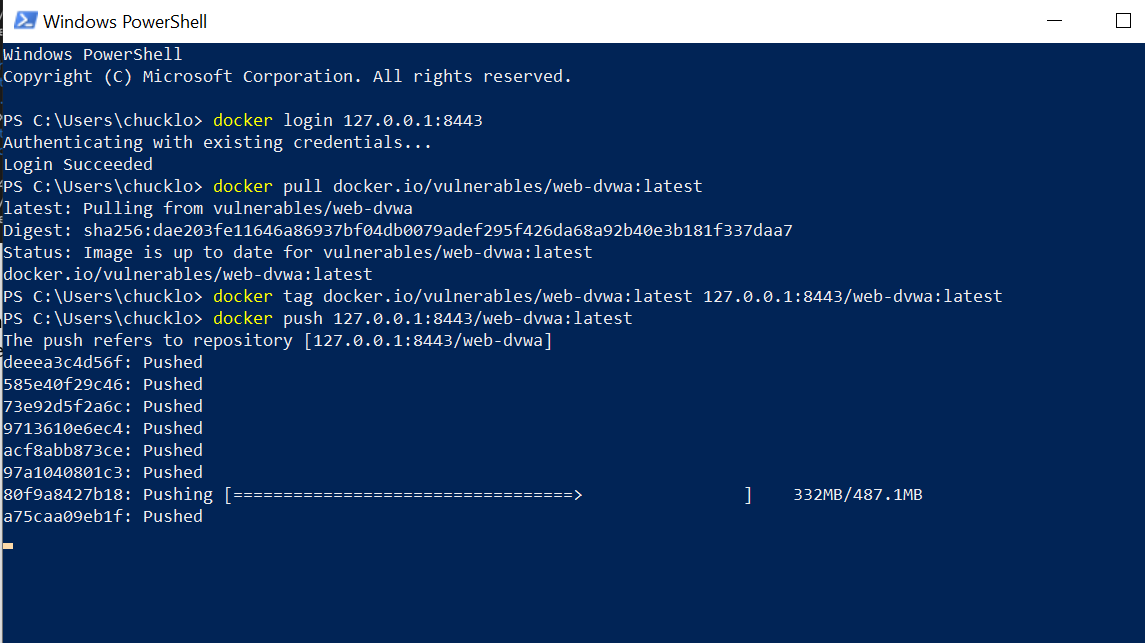
Pat yourself on the back. You now have a local test registry to interact with—all running on your local system. The chicken and the egg scenario is complete. If you want to scan that container image just like you would scan a computer for vulnerabilities, deploy the next component of Container Security.
Demo Part 2: Container Image Scanning with Container Security
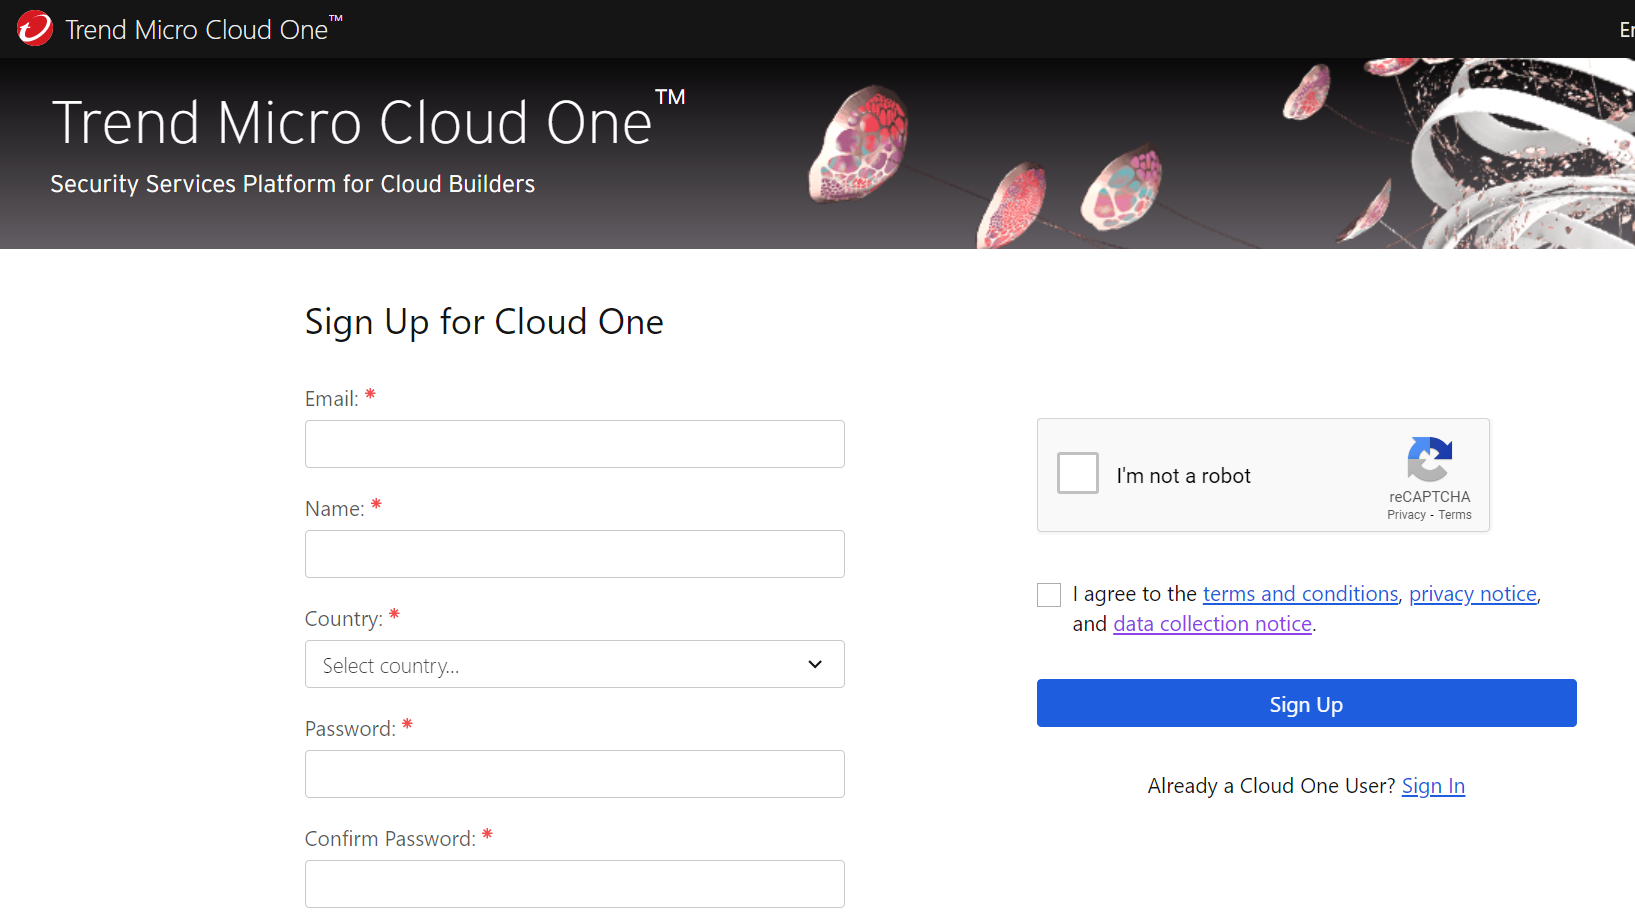
Sign up for a free, 30-day trial of Trend Micro Cloud One™. This gives you access to all seven security services that make up the platform. We will be using Container Security in this demo.
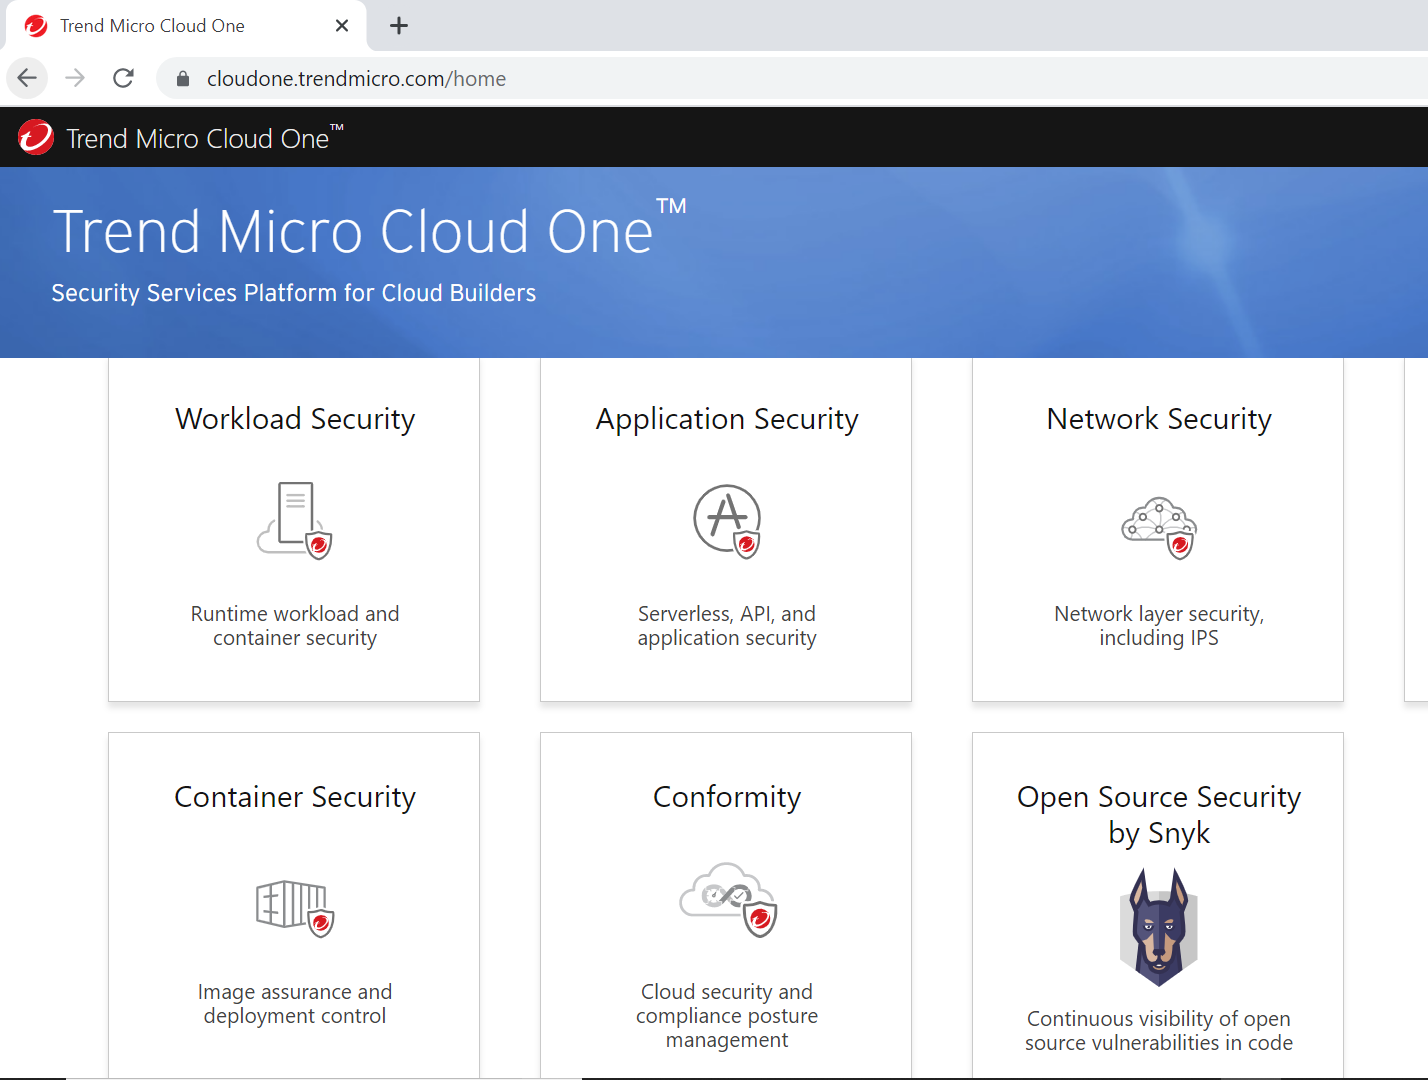
Container Security focuses on complete lifecycle protection for containers from pre-runtime to runtime. There are various options to deploy security, but we are going to focus specifically on the registry. Select the scanners option in Container Security.
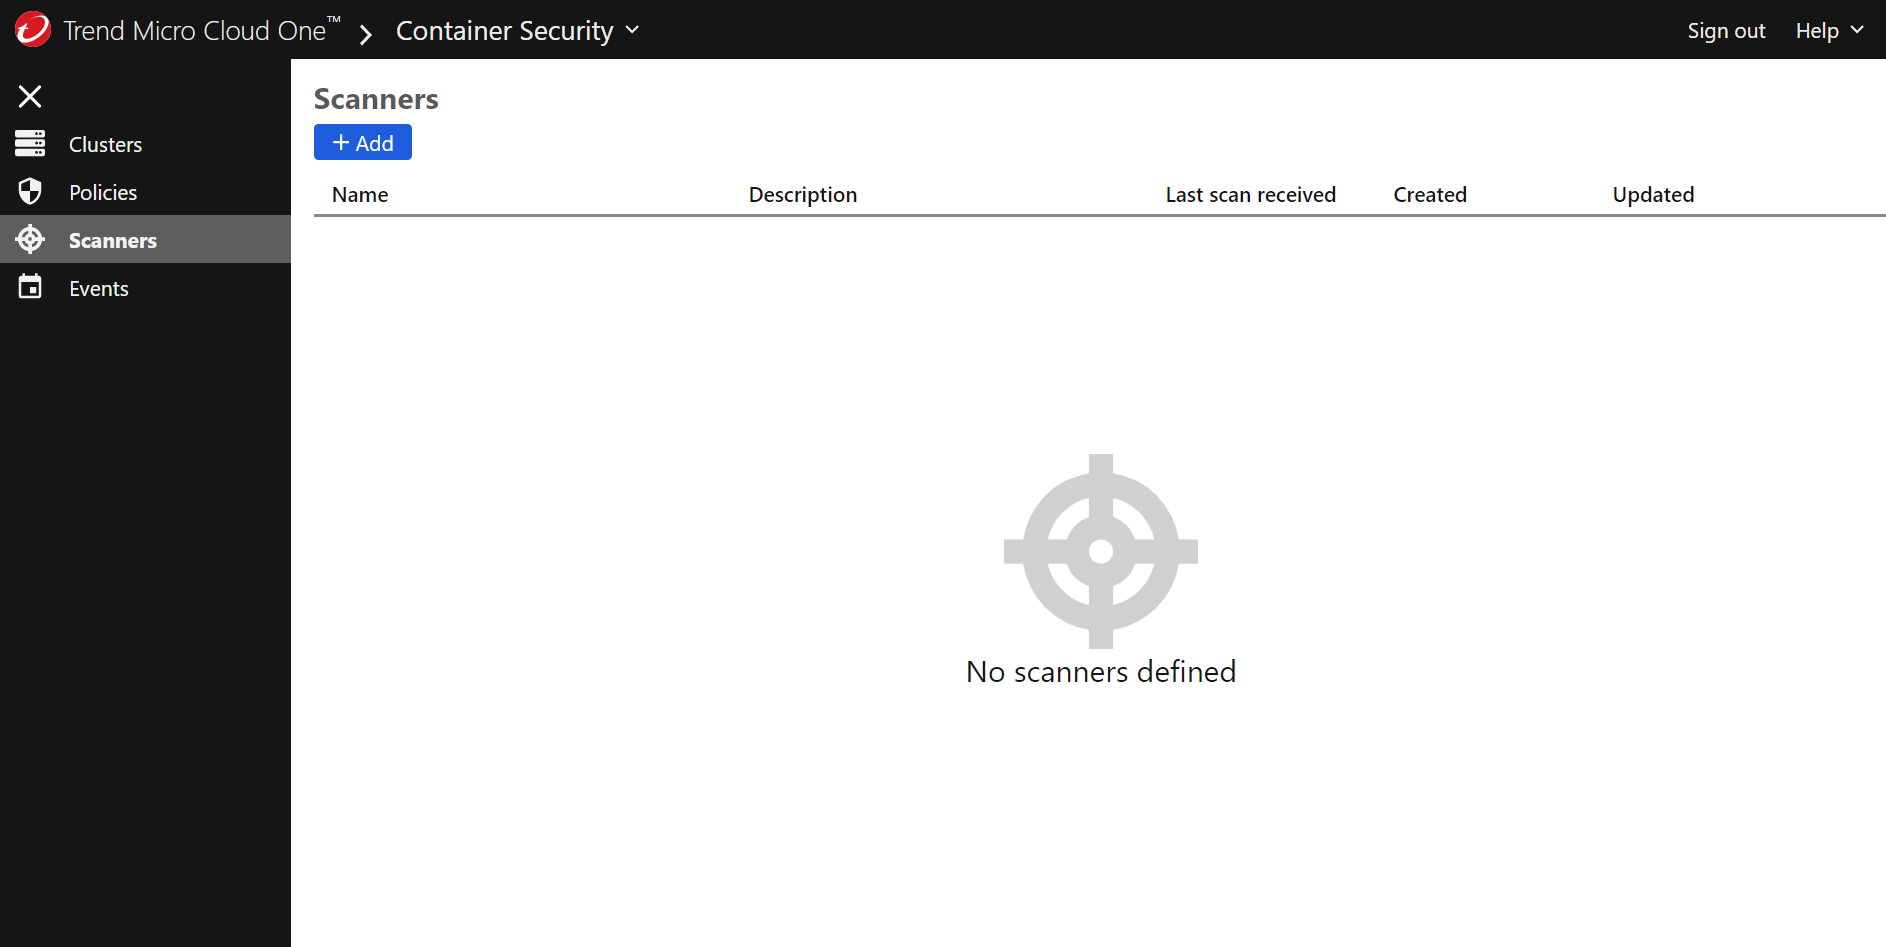
Click +Add button to name and describe the container image scanner that you will deploy in your local Kubernetes environment to scan your local registry and test image.
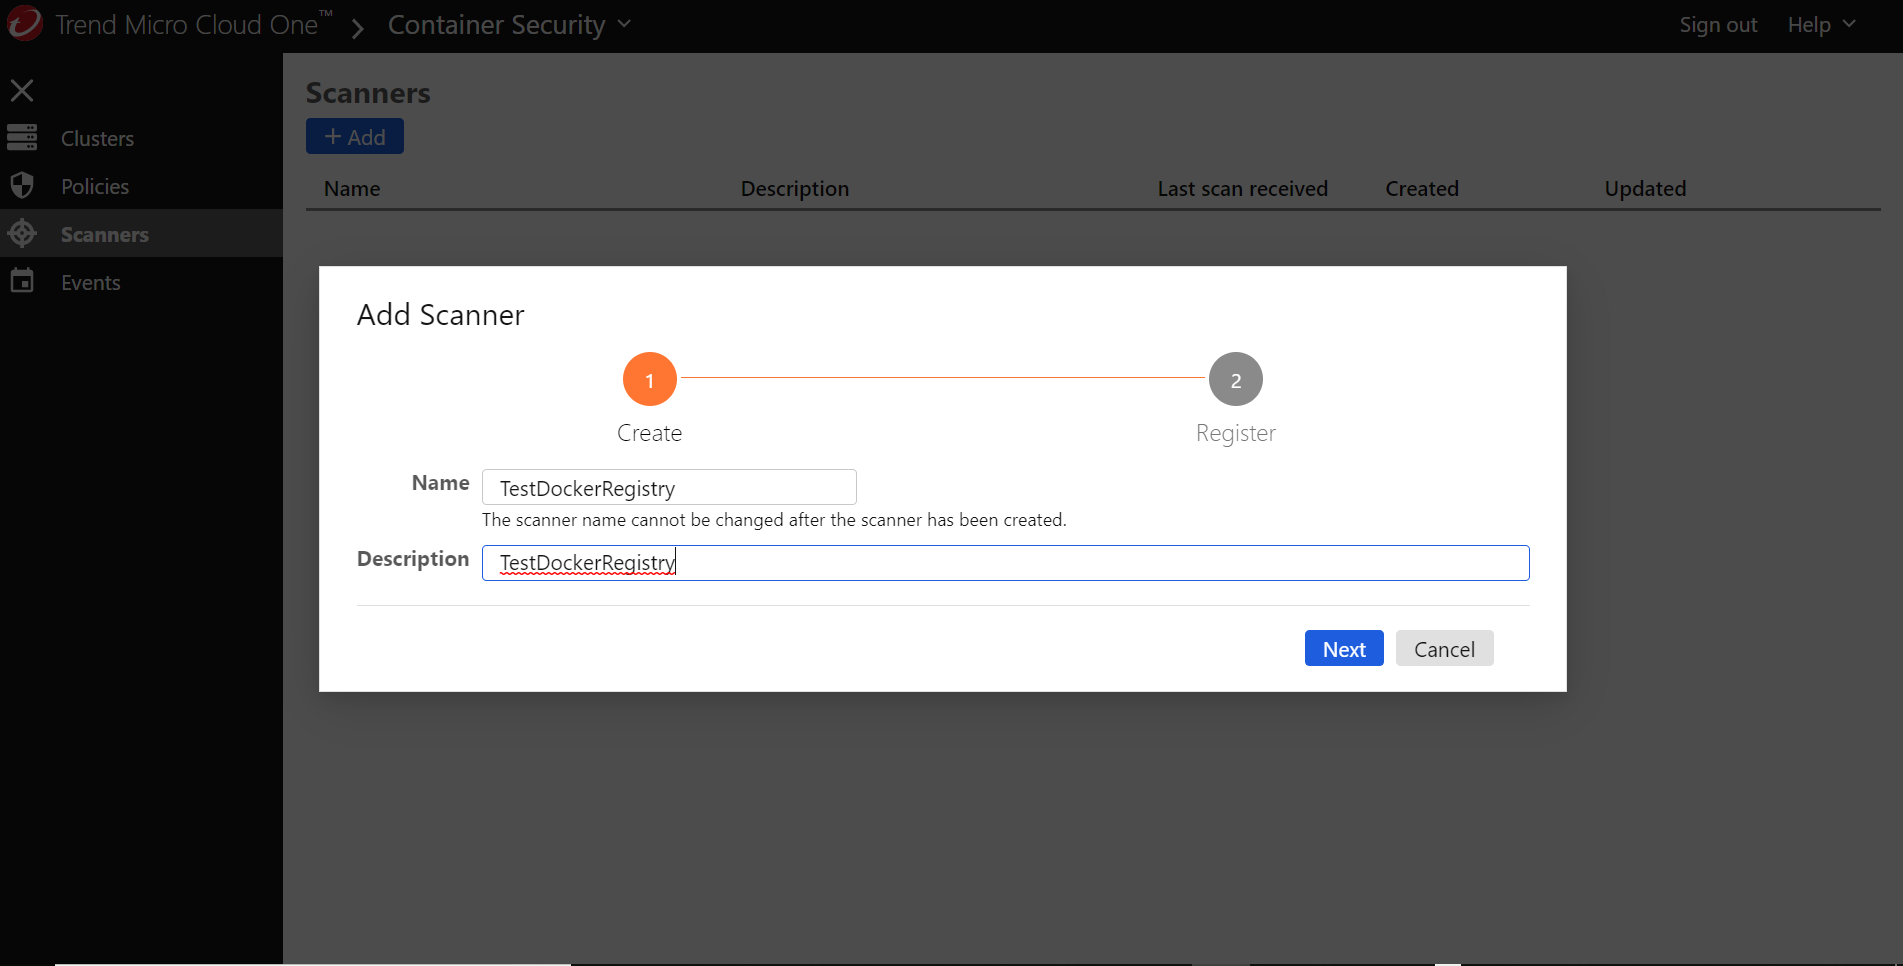
On the screen pictured below, you will build a Kubernetes configuration or manifest file to deploy the Container Security image scanner.
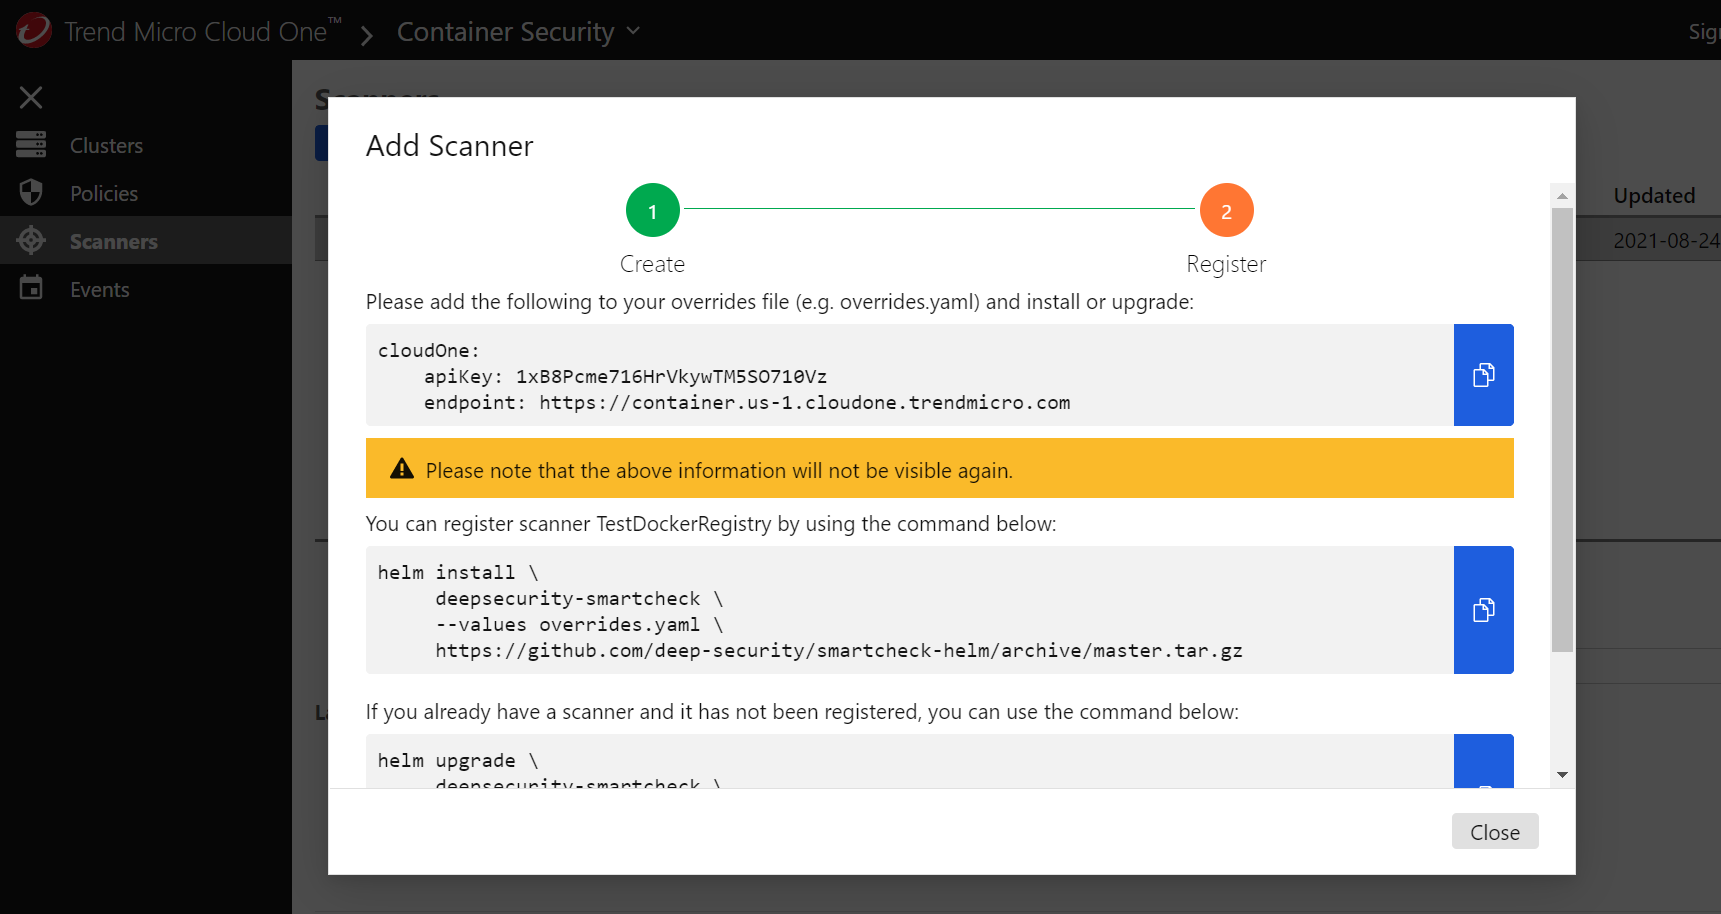
Make a new file in Visual Studio Code named overrides.yaml and add the associated API key and endpoint connection information. This will allow your Kubernetes cluster to communicate with Trend Micro Cloud One.
Next, you will need to install Helm, which is used to run a Kubernetes Helm Chart. This deploys Container Security so it can scan images directly in your Kubernetes cluster. Btw, I prefer using the Chocolatey method to install by using the Chocolatey package manager.
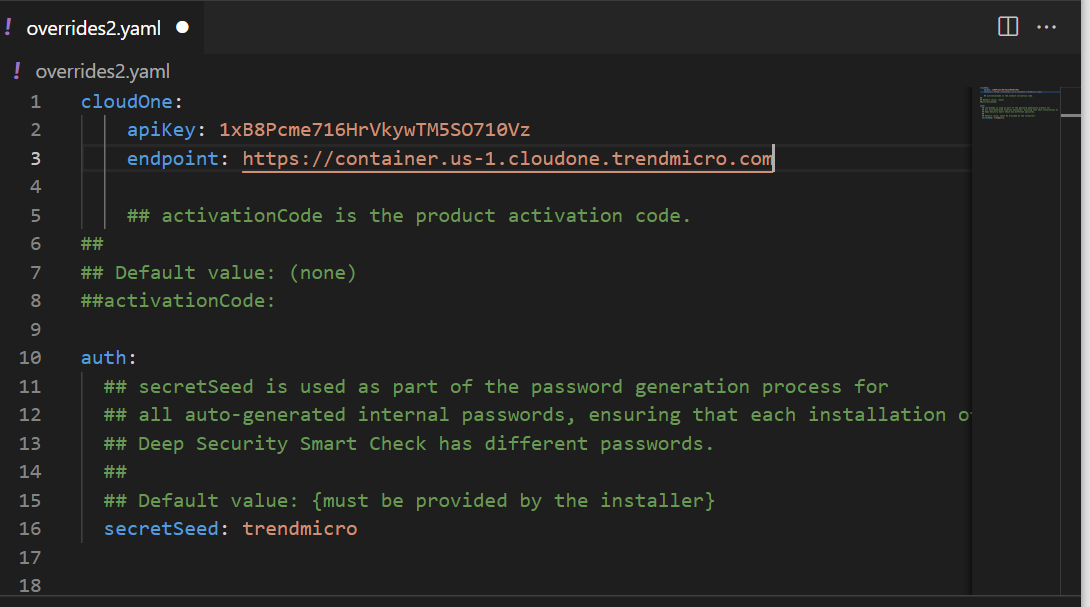
Below is my YAML configuration file with the API key information and the secret seed information that will be used to generate a secure password. The secret seed parameter can be anything you choose.
Below, you can see the Helm Chart deploying and executing successfully.
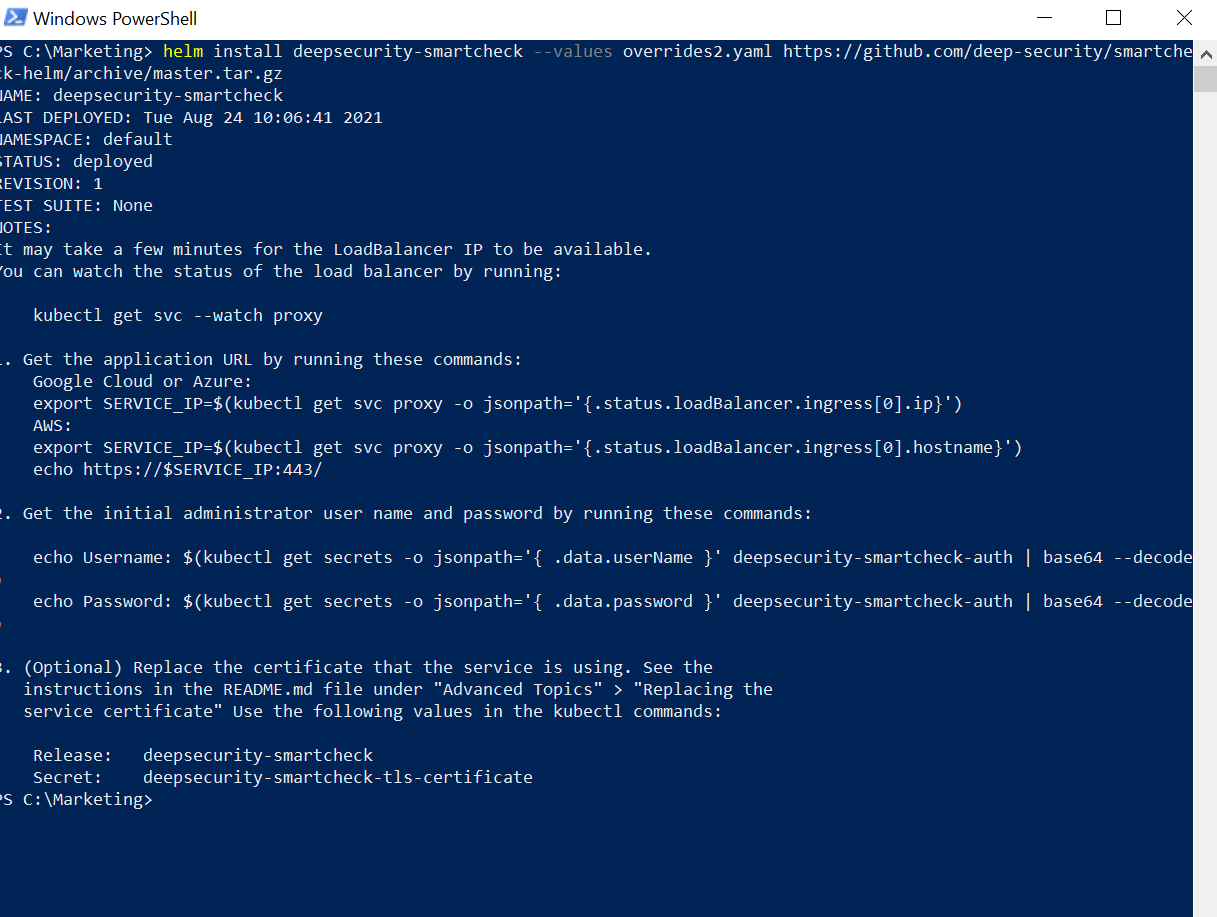
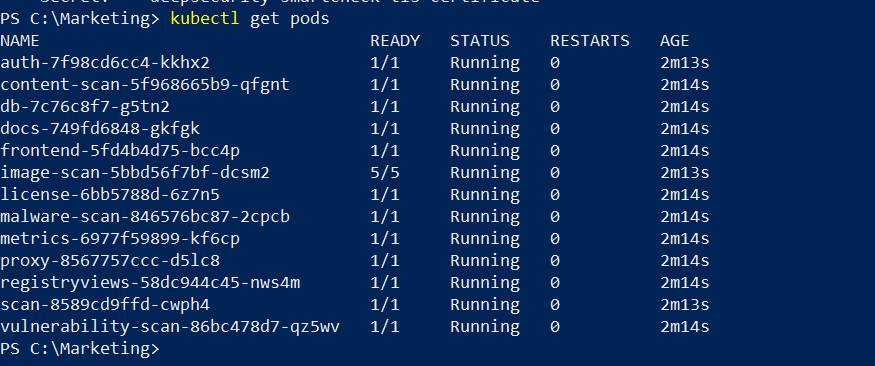
Follow the directions to obtain your initial username, password, and IP address to log onto the container image scanner in Container Security, which should be running in your Kubernetes test environment. You might need to wait for all the scanner pods to start up—you can monitor that by using the following command.
Now, we are going to log on and add our local container registry to be scanned.
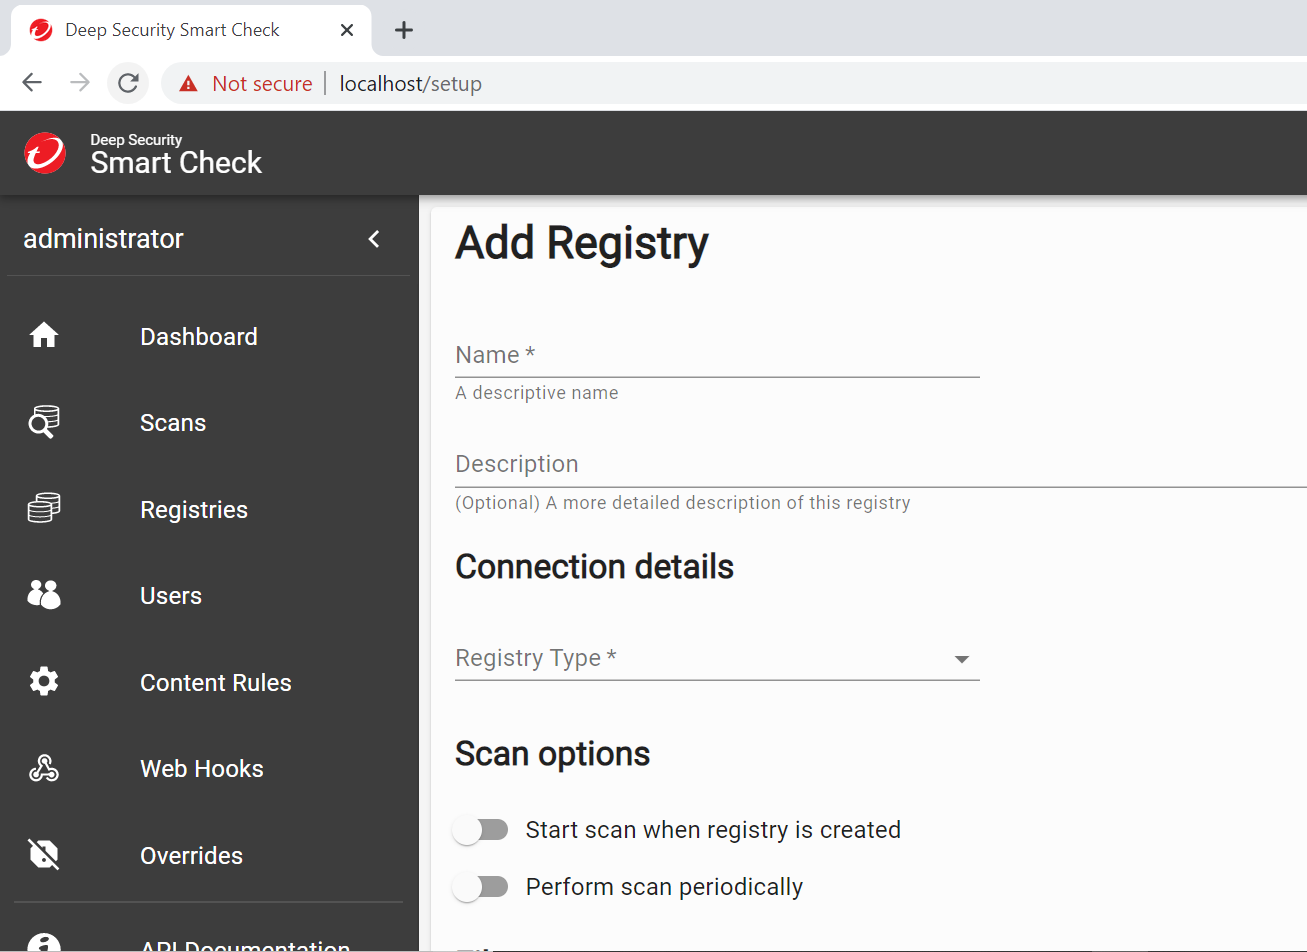
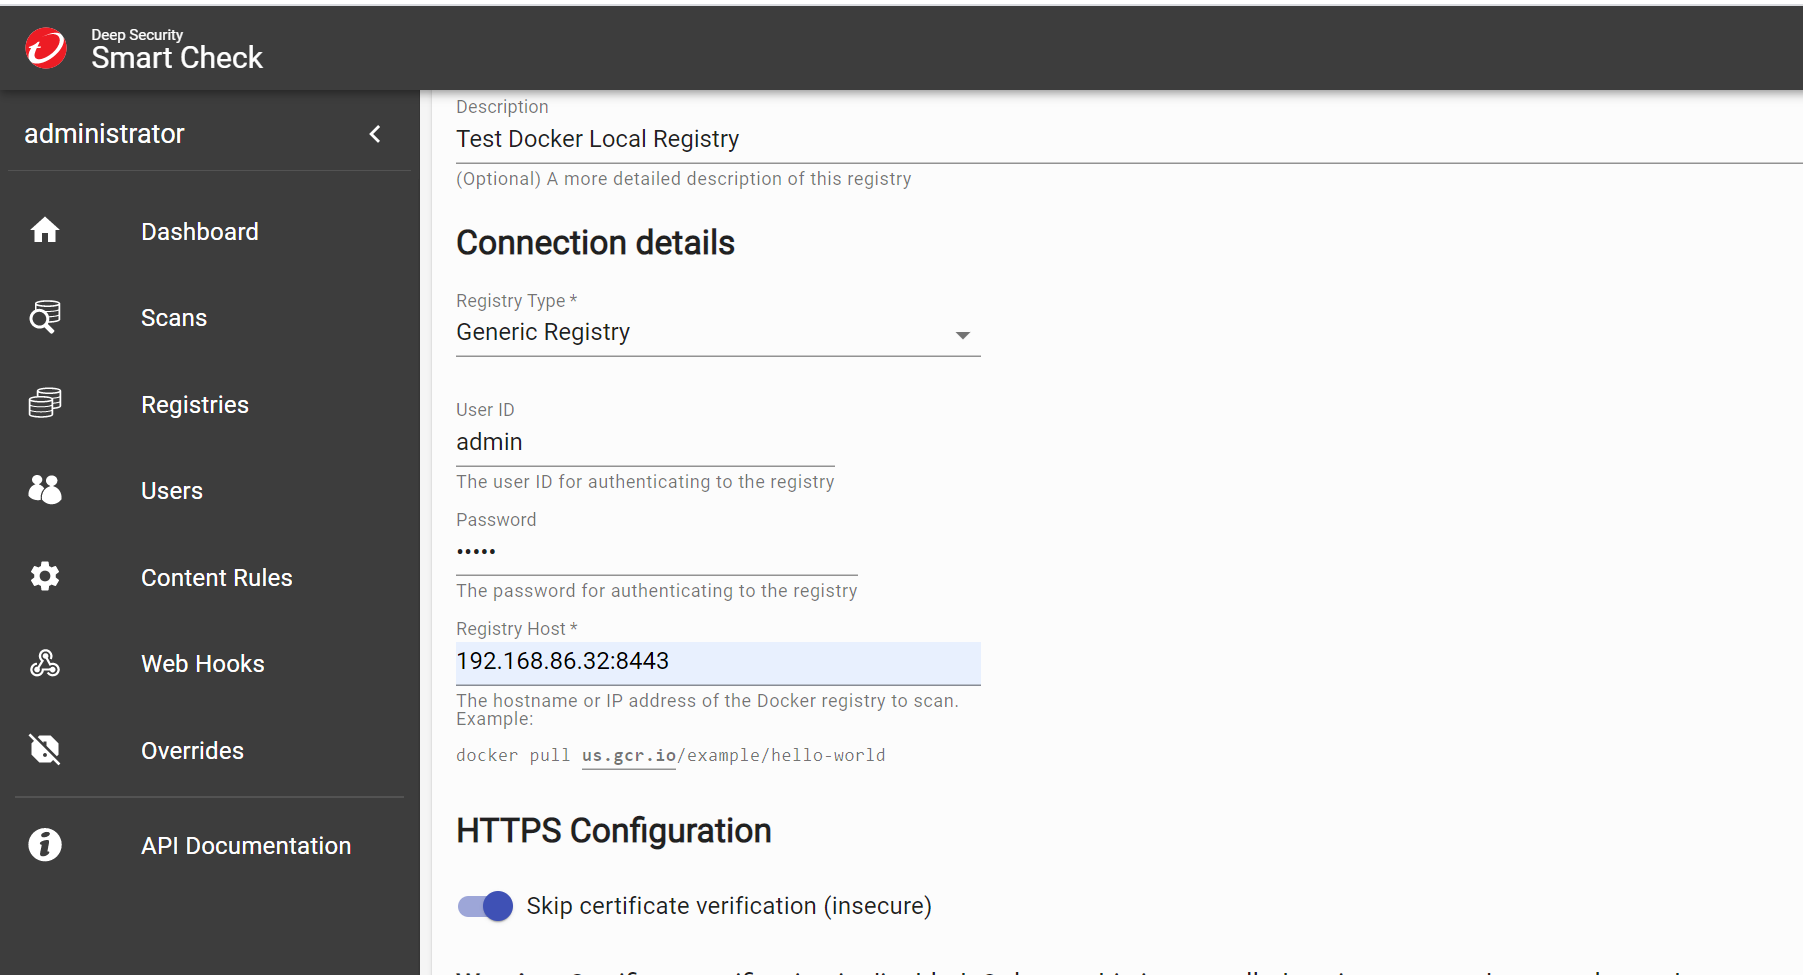
When you first log on, you will be prompted to add a container registry to be scanned. Luckily, we have one to test with. Provide your connection details such as the username and password you setup in your local Dockerfile and the local IP address of your computer.
Your registry should now appear under the Registries section with the detected image that you pushed previously. Now it is ready to be scanned with your very own container image scanner. Go ahead and scan away.
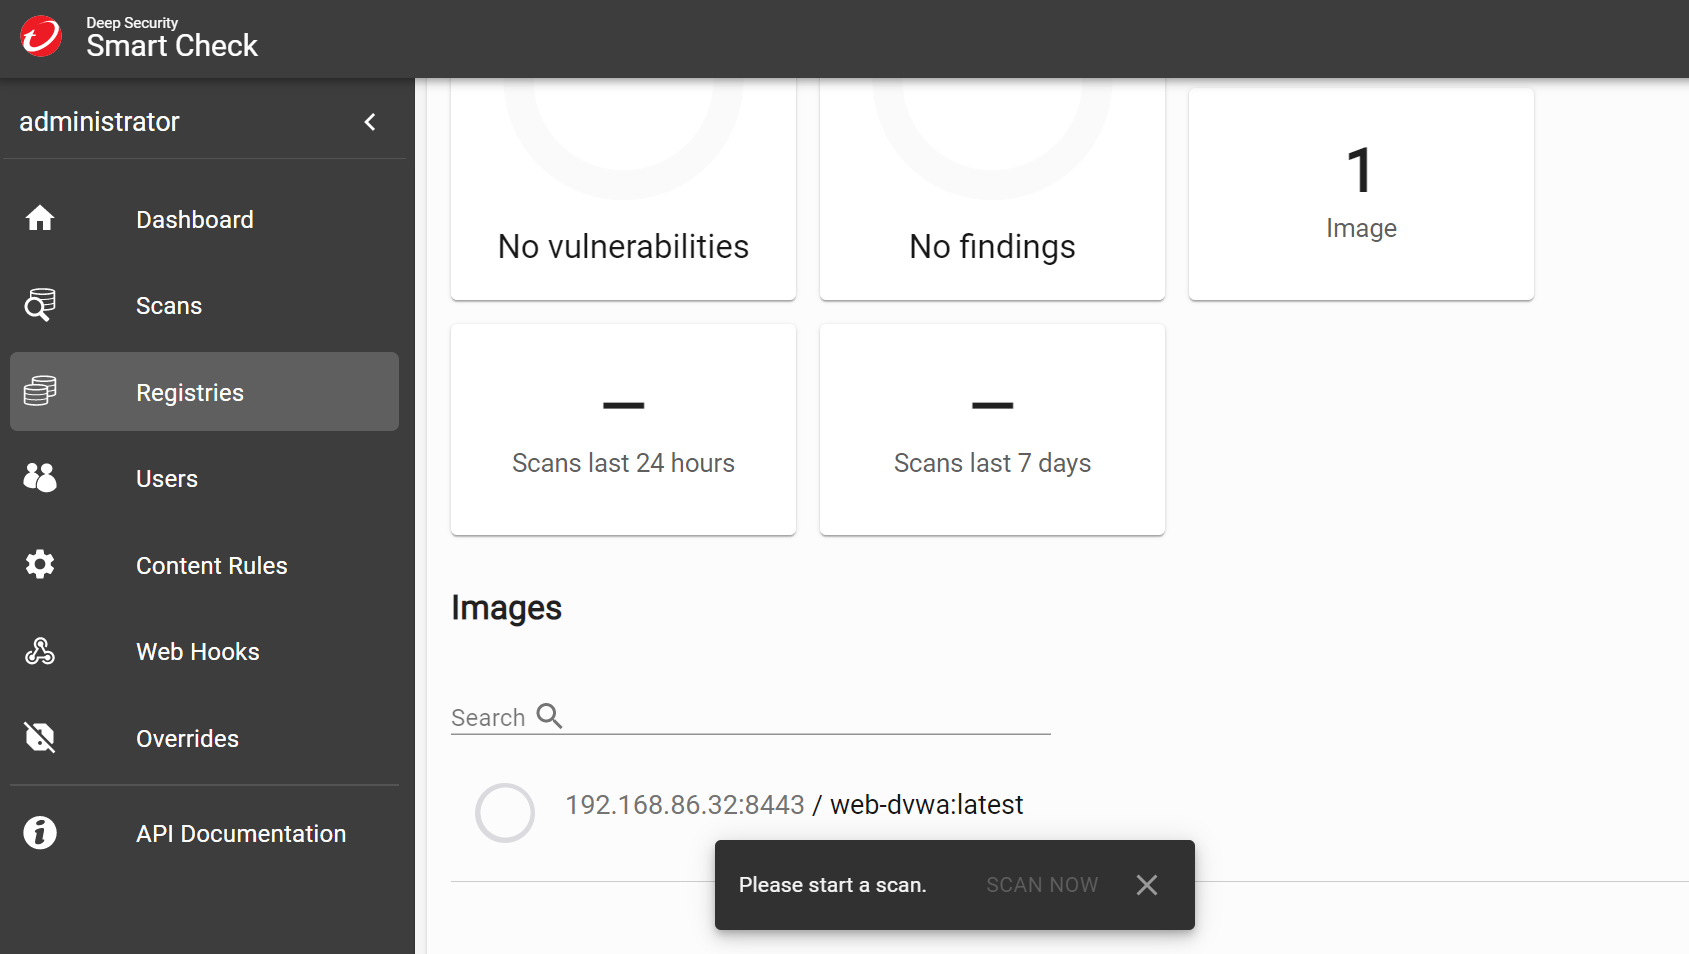
Scanning should take just a few moments before you can view the results.
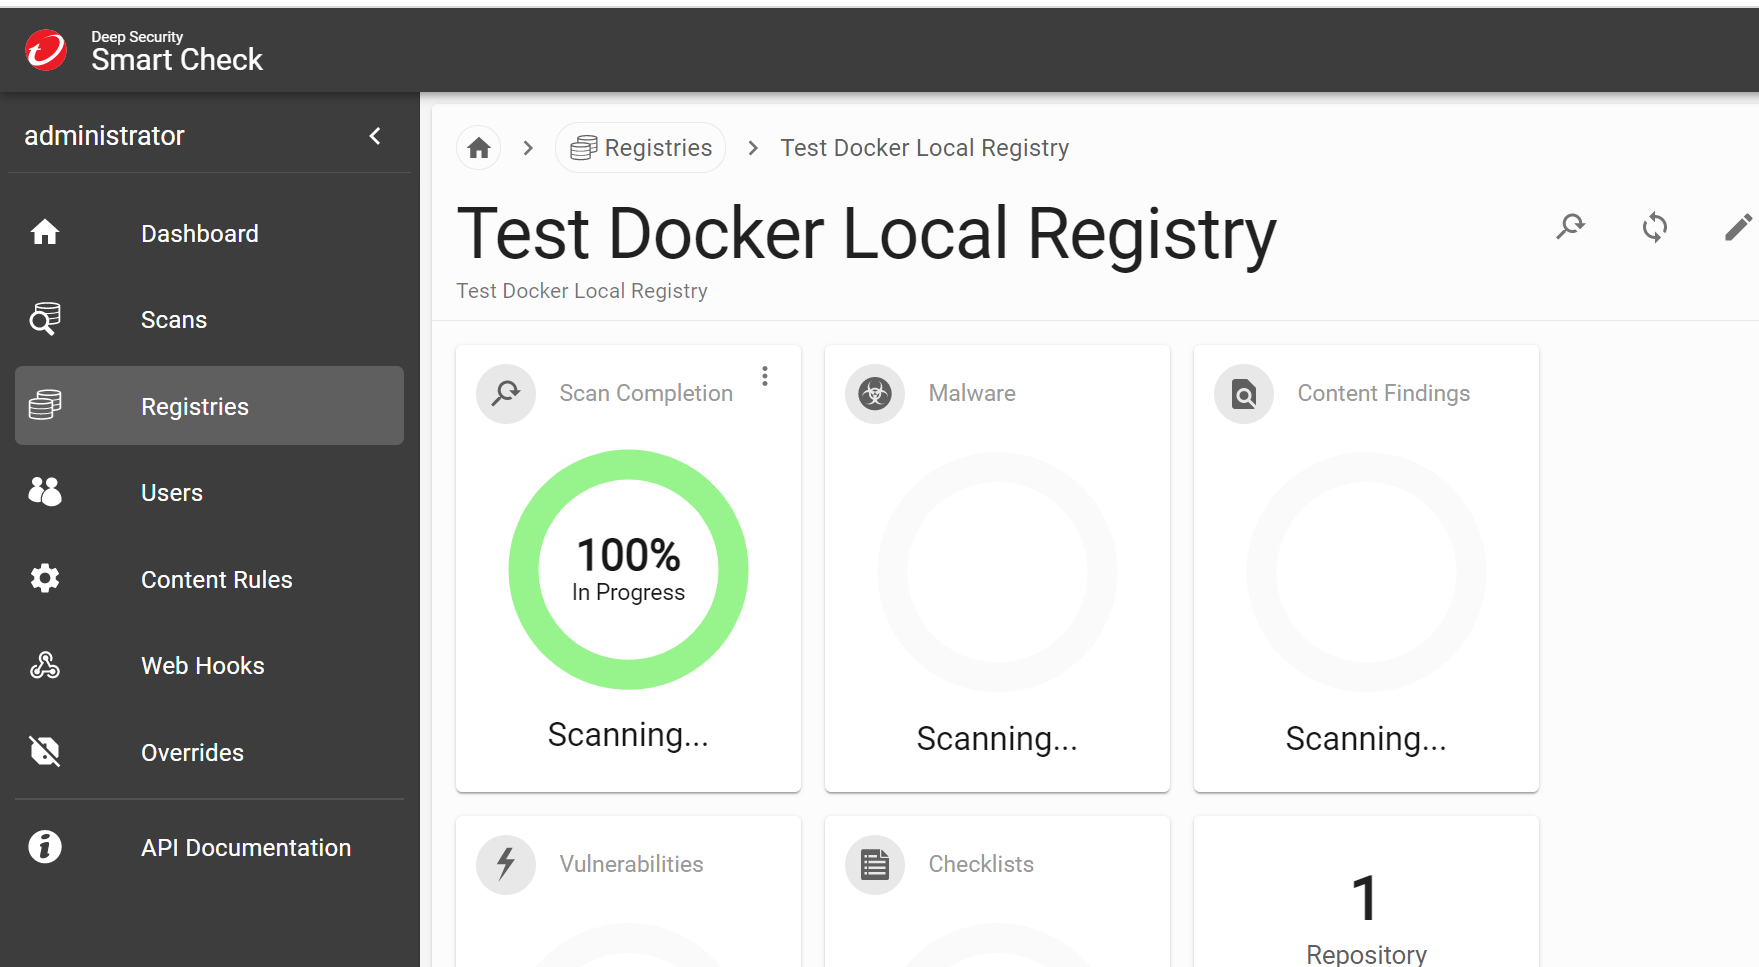
After the scan is complete, all findings will be displayed on the dashboard. You can look at a high level or take a deeper look into the findings.
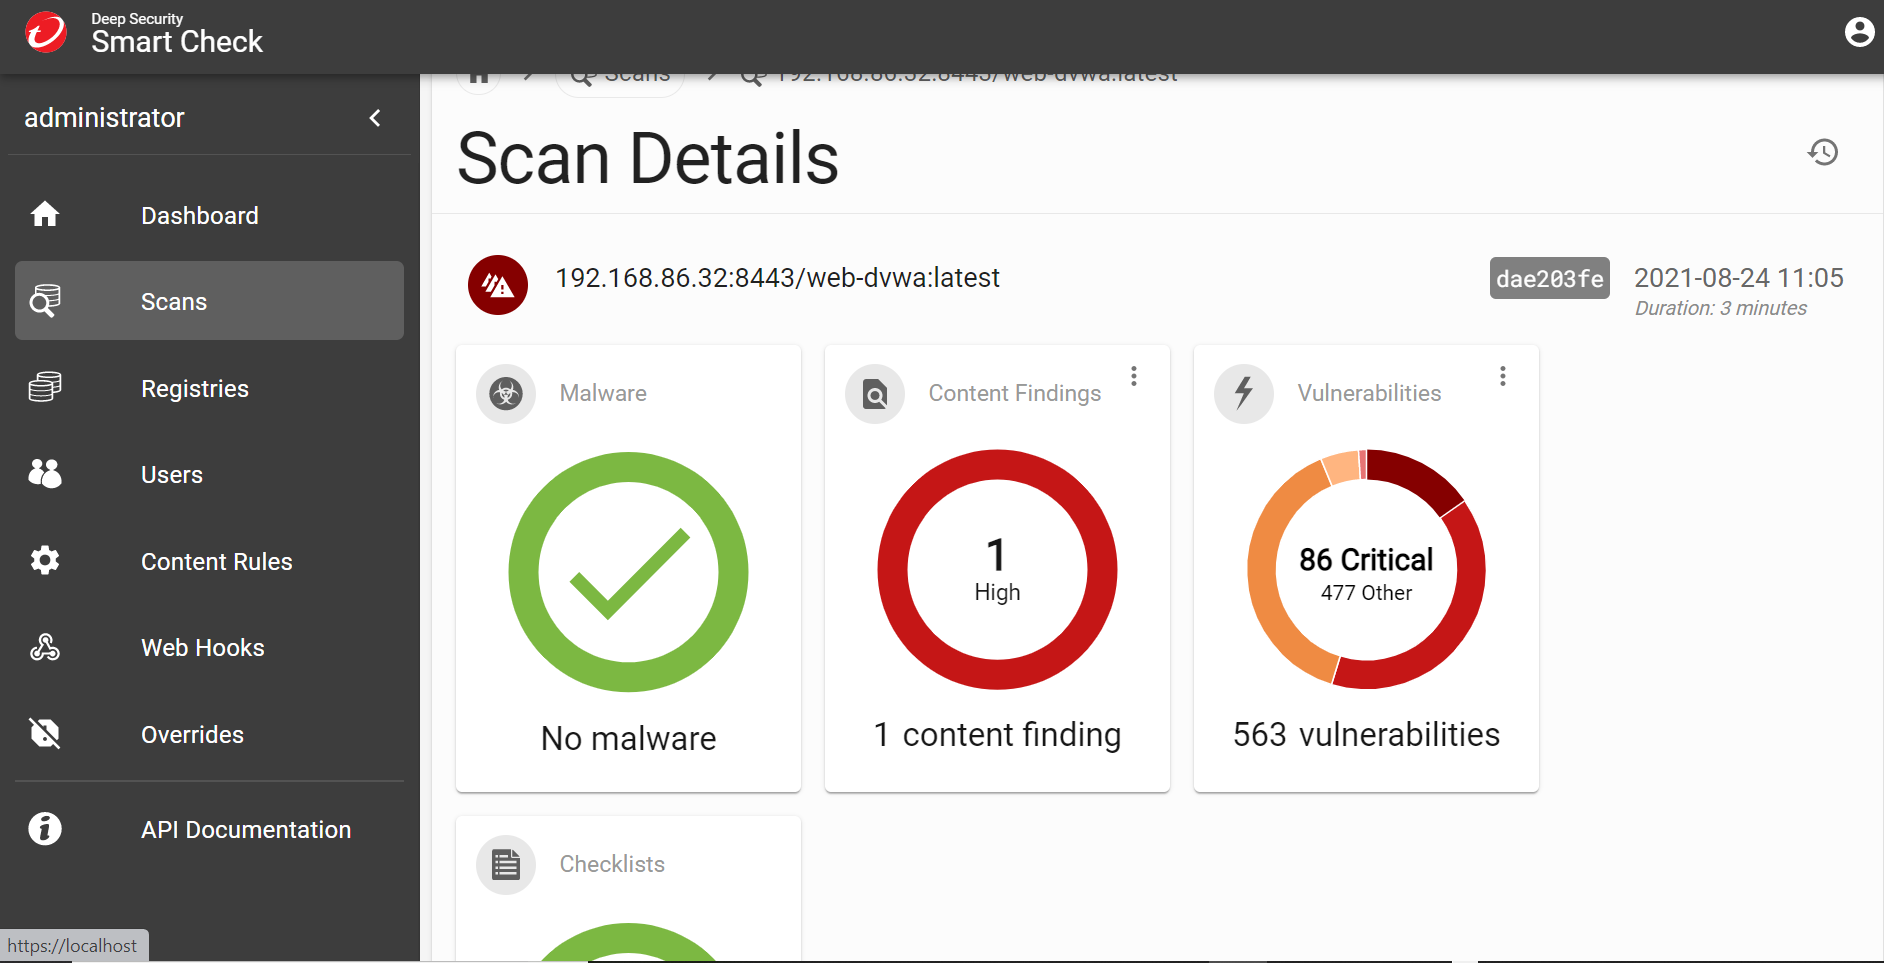
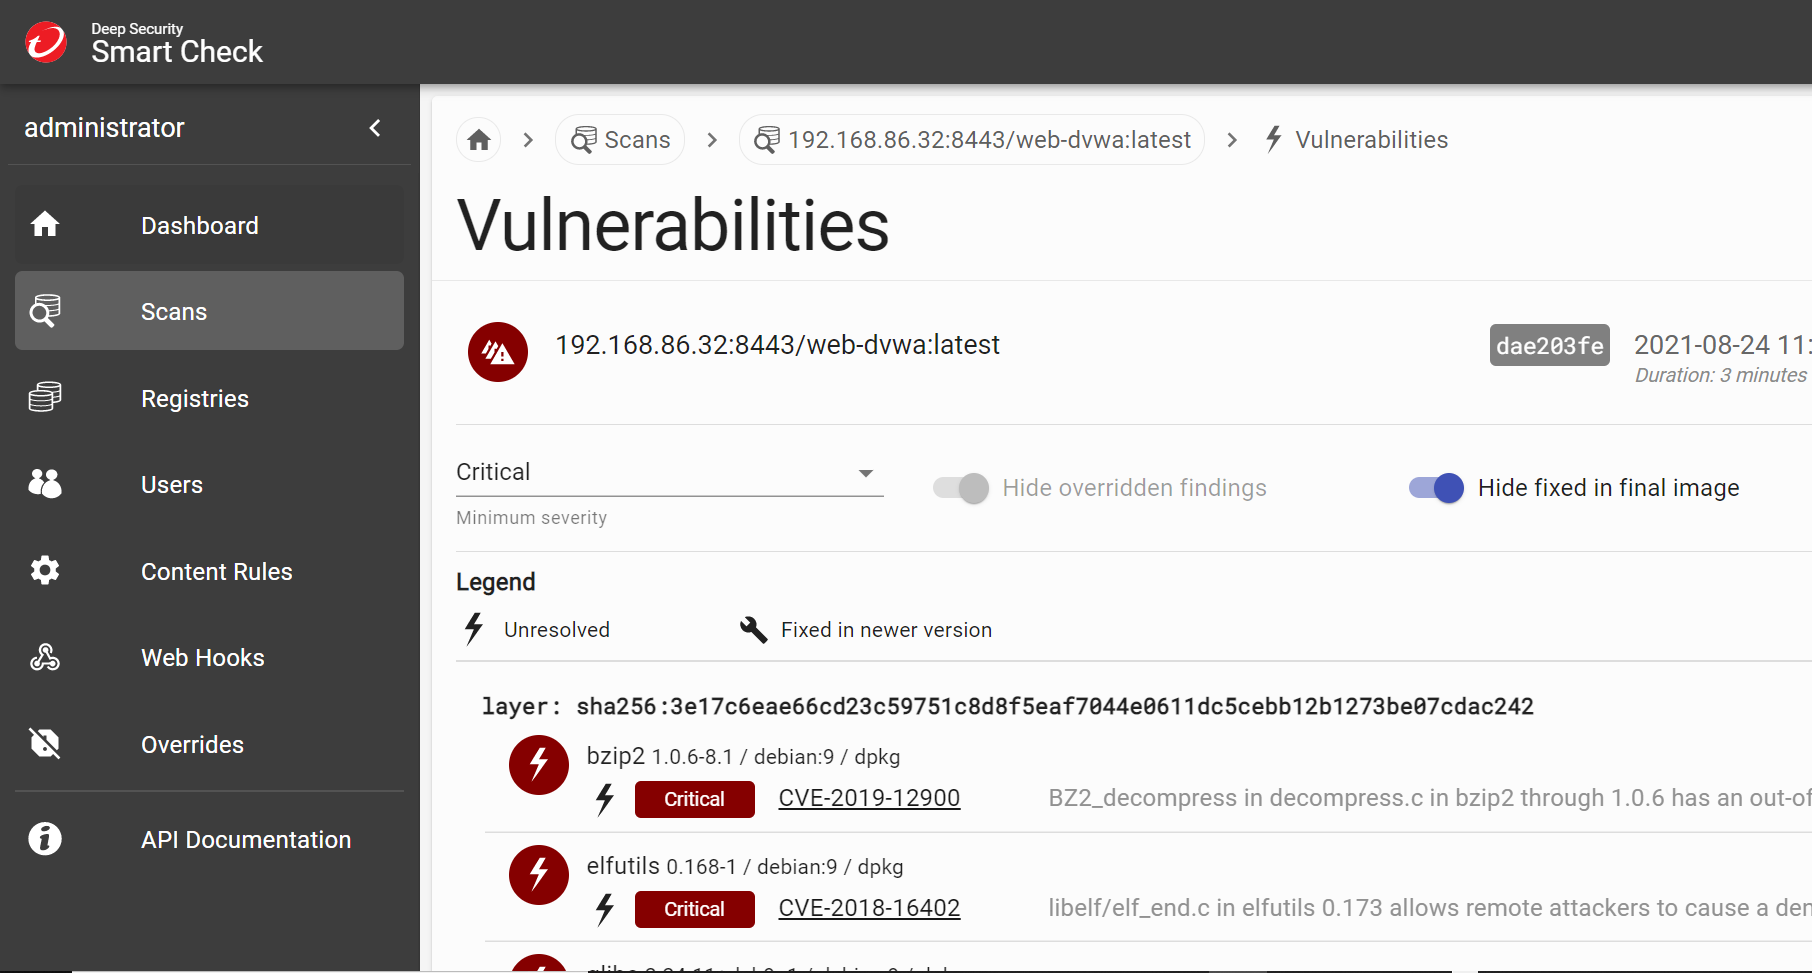
For example, all vulnerabilities shown will be highlighted by severity and display whether there is a fix available in that specific layer. There is also the official CVE write up provided, showing the documentation for how this exploit is used with that specific vulnerability. This provides you with all the information needed for remediating the vulnerability.
Conclusion
Well, that’s it! Hope you enjoyed learning more about building container registries and securing your container images. To dive deeper into the features of Container Security, check out the documentation.
Tags
sXpIBdPeKzI9PC2p0SWMpUSM2NSxWzPyXTMLlbXmYa0R20xk
Read More HERE


