How to locate a password with the macOS Keychain
I will start this out by reminding everyone that you should be using a password manager to store and protect all of your passwords. We’ve reached a point where password managers should be considered an absolute must to help with privacy and security.
That being said, if you’re a user of macOS, then there’s a way to manage your passwords with a built-in tool. Said tool is the Keychain Access tool which is built-into macOS and is ready to serve in the traditional user-friendly way of Apple apps. So, if you’re still not ready to jump on board the password manager trend (you should be), at least you have an option that’s ready to serve.
I’m going to show you how to open the Keychain Access tool and how to use it to locate (and even change) a saved password in macOS and even create a new Keychain item.
The only thing you’ll need to follow along is an Apple laptop or desktop. I’ll demonstrate it on a MacBook Pro running macOS Monterey (version 12.2.1).
With that said, let’s get to work.
Opening the Keychain Access tool
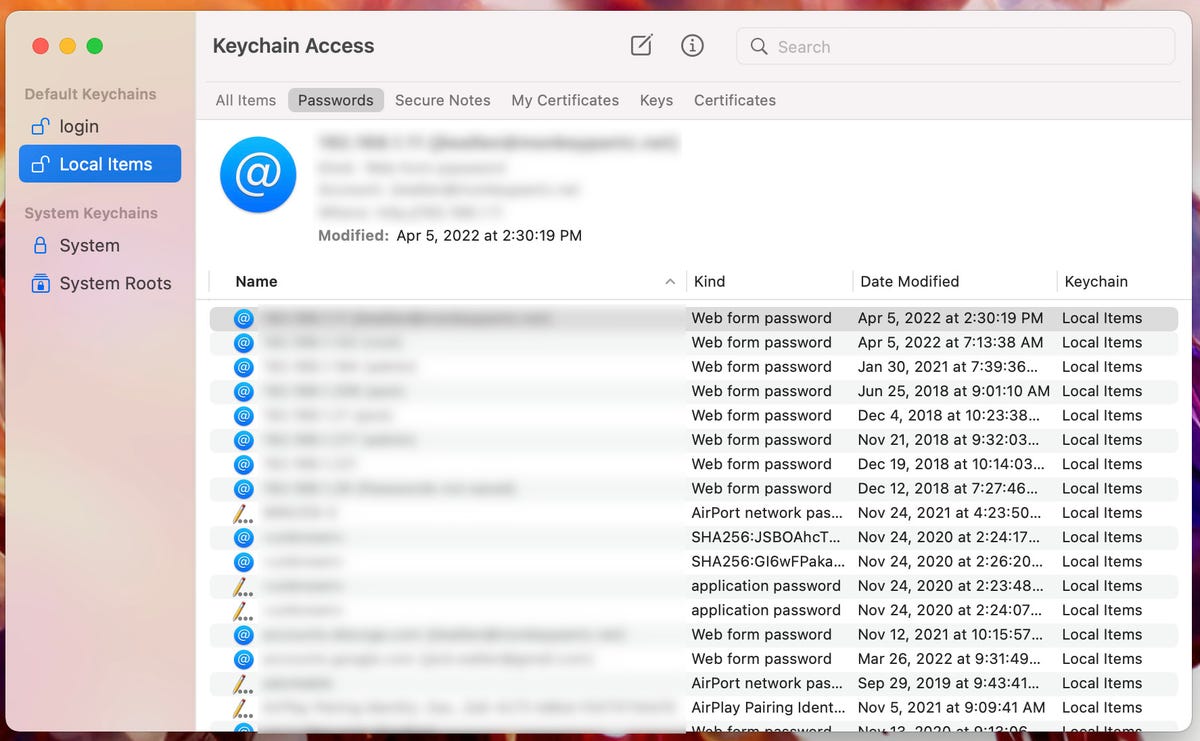
To open the Keychain Access tool, click on the Launchpad located in the Dock. From there, type keychain and then click on the icon for Keychain Access. In the resulting window, click on the Passwords tab to reveal every entry (Figure 1) that’s been saved to macOS.
Figure 1

The macOS Keychain Access saves passwords, secure notes, certificates, and keys.
Make sure to click Local items in the left navigation and you’ll see every password entry that’s been saved locally.
Viewing a password within the Keychain Access tool
You can either scroll through the listing or use the search tool to locate the entry you want to view. Once you’ve located the entry in question, double-click it or right-click it and click Get Info from the resulting menu.
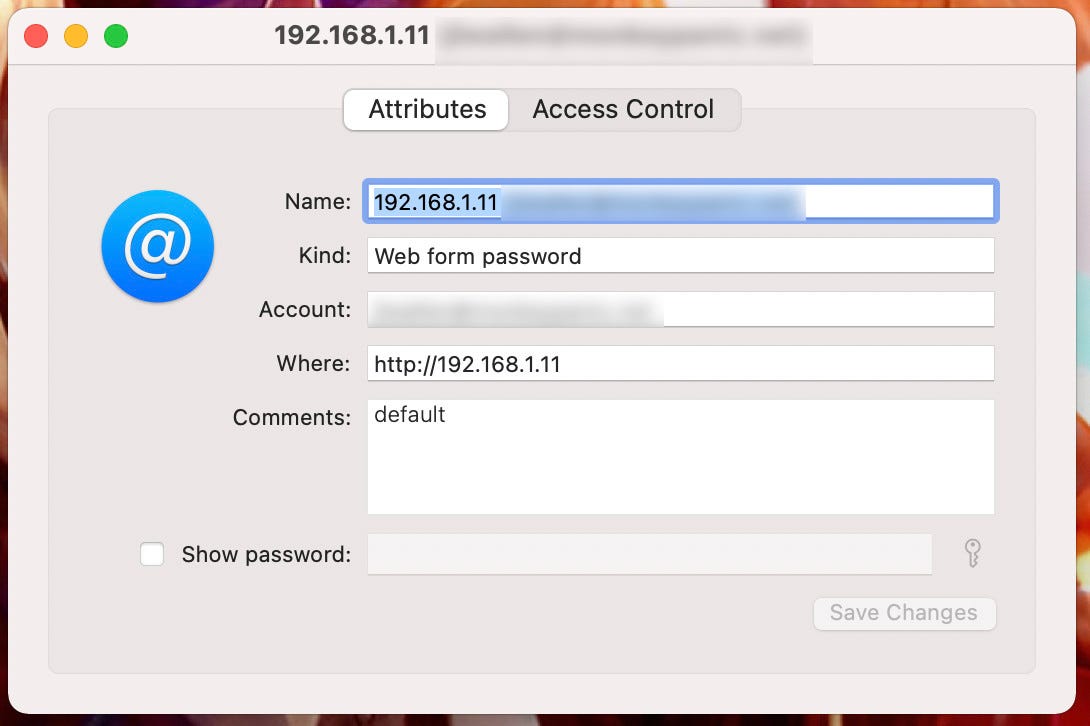
A new window will appear (Figure 2) containing all of the information for that entry.
Figure 2

An entry for a server I have on my LAN includes plenty of information.
As you can see, the password is hidden from sight. To view the password for the entry, click Show password and, when prompted, type the password for your user account. The password will then appear in the field. You can then either copy it to the clipboard and use it or you can change it (if necessary).
To change the password, simply erase what’s there and type the new entry. After changing the password, make sure to click Save Changes and the password will be updated.
Creating a password entry
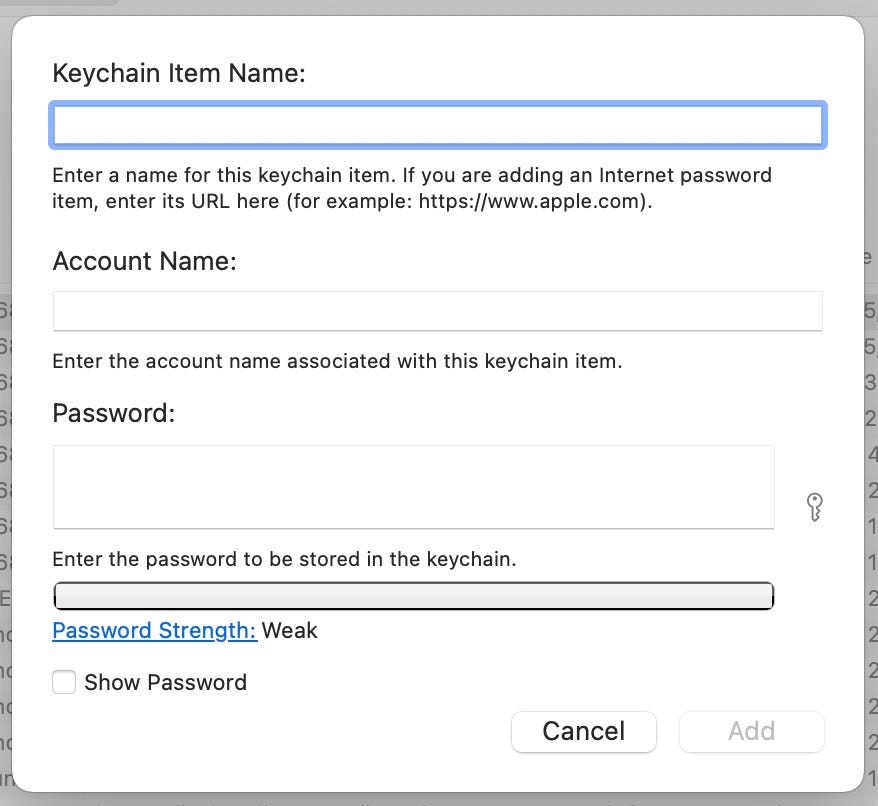
Creating a new password entry in Keychain Access is just as simple. From the Passwords tab, make sure to click Local Items and then click the New icon at the top (small square with a diagonal line). When the new window appears (Figure 3), type a name (or URL) for the Keychain item, add an account name (a username), and then type the password associated with the item.
Figure 3

Creating a new password entry to be stored in the Keychain Access tool.
Make sure to pay attention to the Password Strength indicator. You always want to be using strong passwords. If your password is weak or fair, make it more complicated until you reach an Excellent rating.
Click Add to save the new entry.
And that’s all there is to locating/editing a password entry in macOS and even creating a new entry. If you’re not ready to migrate to a full-blown password manager, you should at least start using the Keychain Access tool until you’re ready to make the jump.
Read also:
READ MORE HERE

